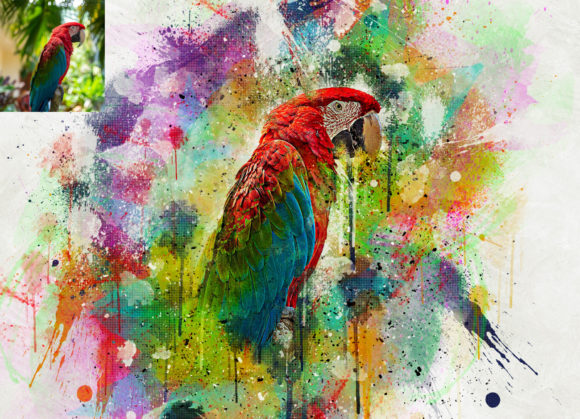
Integrating the Splatter Watercolor Photoshop Action into Your Creative Workflow
In the fast-paced world of digital design and photography, efficiency is just as critical as creativity. Professionals, from freelance photographers to marketing agencies, constantly seek tools that streamline post-production without sacrificing artistic integrity. The Splatter Watercolor Photoshop Action represents a significant shift in how creators approach texture and stylization. Rather than manually painting every droplet or blending each hue, this automated tool allows users to achieve complex, hand-painted aesthetics with precision and speed. Understanding how to integrate this action into your broader workflow can transform a standard editing session into a highly productive creative process.
Understanding the Tool and Its Role in Design
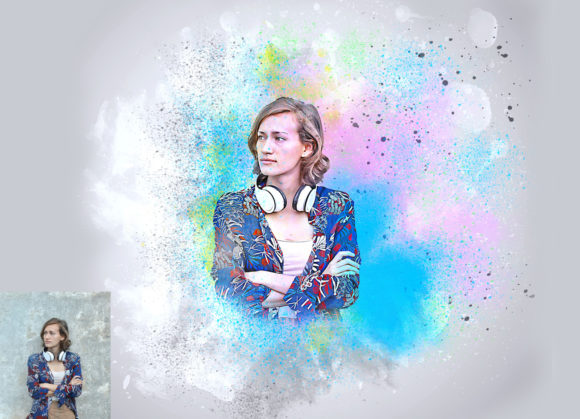
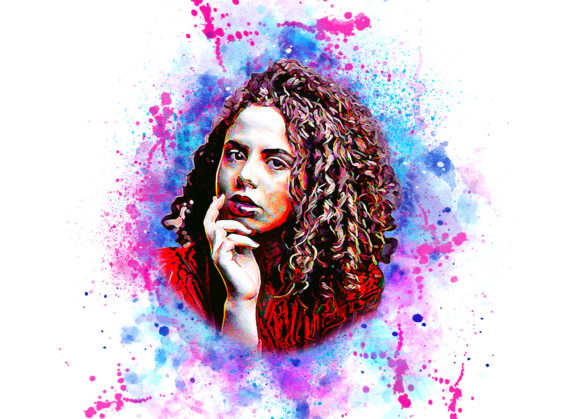
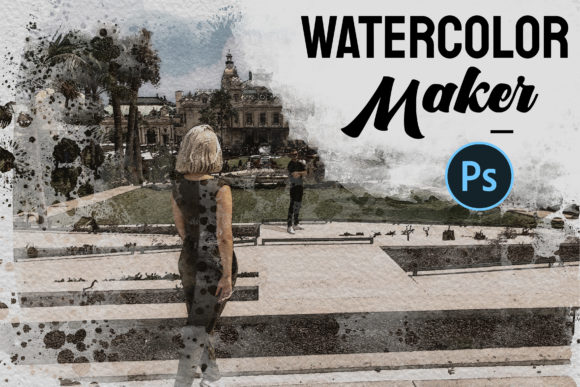
The Splatter Watercolor Photoshop Action is not merely a filter; it is a scripted sequence designed to mimic the organic unpredictability of watercolor paints combined with dynamic splatter effects. For designers and photographers, this tool serves as a bridge between realistic imagery and abstract art. It fits seamlessly into workflows where unique visual identity is paramount, such as album cover design, editorial illustrations, social media campaigns, and personalized gift products.
What sets this specific action apart is its versatility. It comes equipped with ten distinct color options, allowing for immediate customization to match brand guidelines or artistic visions. Whether you are working on a vibrant summer campaign or a moody, monochromatic portrait, the action provides a foundational layer of complexity that would otherwise take hours to construct manually. By automating the tedious aspects of texture creation, it frees up mental bandwidth for higher-level creative decisions, such as composition, lighting adjustments, and narrative storytelling.
Preparation and Compatibility: Setting the Stage
Successful implementation of any digital asset begins with proper preparation. Before applying the Splatter Watercolor Photoshop Action, it is essential to ensure your software environment is compatible. This tool supports a wide range of Adobe Photoshop versions, including CS4, CS5, CS5.5, CS6, and the Creative Cloud series from CC2014 through CC2020. This broad compatibility ensures that freelancers working with older hardware or agencies using standardized enterprise software can both utilize the tool effectively.
However, compatibility is only the first step. The quality of the output is directly proportional to the quality of the input. To achieve stunning results, you must prepare your canvas correctly. A common mistake among beginners is applying actions to low-resolution images or cramped compositions. For optimal performance, resize your images to high standards, such as 3000x2000 pixels or 2000x3000 pixels, at 300 DPI. This resolution ensures that the watercolor textures remain crisp and detailed, avoiding pixelation when the final piece is printed or viewed on high-density displays.
Furthermore, expanding the canvas area is a crucial preparatory step. Since watercolor effects often bleed beyond the subject’s edges, selecting your background image and using the crop tool to expand all sides provides necessary breathing room. This simple adjustment prevents the action from cutting off essential artistic elements, resulting in a more natural and professional finish. Always refer to the included PDF help file for visual guidance on these initial setup steps, as proper preparation eliminates many common errors before they occur.
Execution: A Streamlined Process
Once the canvas is prepared, the execution phase begins. The workflow for the Splatter Watercolor Photoshop Action is designed to be intuitive, yet it requires strict adherence to naming conventions and layer management. Start by opening your photo and creating a new layer. Rename this layer “paint” in lowercase letters. This specific naming convention is vital because the action script looks for this exact label to determine where to apply the effects. Failure to name the layer correctly will result in the action failing or producing unintended results.
With the “paint” layer selected, use a soft brush to paint over the areas where you want the watercolor effect to appear. This step gives you complete control over the intensity and placement of the texture. You are essentially telling the software where the "water" should flow. After painting, hide the visibility of the paint layer by clicking the eye icon, but keep the layer selected. Then, click the play button on the action panel. The script will process the image, generating the splatter and watercolor layers automatically.
During the playback, you will encounter a stop message prompting you to set the foreground color to black (hex code #000000). At this stage, choose the Brush Tool and select from the pre-loaded brushes. Use these brushes to refine the effect, primarily focusing on the subject’s face or key focal points. This interactive pause allows for real-time customization, enabling you to erase unwanted splatters or add detail where the automatic generation might have been too sparse. Once satisfied, continue the action to finalize the effect.
Integration with Broader Creative Workflows
The true value of the Splatter Watercolor Photoshop Action lies in how it interacts with other tools and methods. It is rarely used in isolation. Instead, it functions as a mid-stage enhancement within a larger editing pipeline. For instance, a photographer might first perform basic color correction and exposure adjustments in Lightroom before importing the image into Photoshop. After applying the watercolor action, they might return to adjust contrast or add typography for a poster design.
For marketers and entrepreneurs, this tool can significantly reduce turnaround time for content creation. Imagine needing ten variations of a product image for an A/B test on social media. By using the ten different color options included in the set, you can rapidly generate diverse visual assets without starting from scratch each time. This consistency in style, paired with variation in color, helps maintain brand recognition while keeping content fresh.
Educators and bloggers can also leverage this action to create engaging header images or illustrative diagrams. The artistic flair added by the watercolor effect can make educational materials more approachable and visually appealing. When combined with text overlays and layout tools, the action helps transform standard stock photos into custom graphics that stand out in crowded digital feeds.
Quality Control and Long-Term Use
To ensure long-term utility, maintain an organized library of your processed files. Save your work in PSD format to preserve layers, allowing for future edits. If a client requests a change in color scheme six months later, having the layered file means you can simply toggle the visibility of different color groups or re-run the action with new parameters. This non-destructive workflow is essential for professional sustainability.
Additionally, consider the context of your audience. While the splatter effect is striking, it should enhance the subject, not overwhelm it. Use the opacity settings of the generated layers to dial back the intensity if the effect feels too aggressive. Subtlety often yields more sophisticated results. Over time, you will develop an intuition for which images benefit most from this treatment—typically those with strong contrasts and clear subjects.
In conclusion, the Splatter Watercolor Photoshop Action is a powerful asset for anyone looking to elevate their visual content efficiently. By understanding the technical requirements, following the precise execution steps, and integrating the tool into a broader creative strategy, you can unlock new artistic possibilities. Whether you are a seasoned designer or a hobbyist exploring digital art, this action offers a reliable pathway to creating unique, awesome-looking images that capture attention and convey emotion. Embrace the process, experiment with the color options, and let the tool handle the complexity while you focus on the vision.